
“The answer’s not in the box, it’s in the band” says Gary Winston, character from the 2001 film Antitrust. The generic CEO character loosely based on Bill Gates. I always thought it was a pretty cool line, and up until now, never really found anything that it applied to.
Enter OpenGraph Protocol
You’ve no doubt shared a webpage on facebook before. Usually, Facebook will crawl the page, looking for explictly set OpenGraph meta tags. If they are absent, it will pull the title, and the first image and description it deems to be the best representation of the page. You won’t see them in your browser – they’re hidden in the code.
If you’re a web developer, you no doubt know about the OpenGraph protocol, which allows you to specify the image, description, title and URL of your webpage when it’s shared on facebook. Like most developers, you probably save a 1200×630 JPEG image using Photoshop’s “Save for Web As..” option. This is a great option when you’re trying to balance image quality and image size, but no matter how high quality you save the image, facebook will recompress the image, causing artifacts and a generally poor image quality.
PNG to the Rescue
JPEG is pretty much the go-to image format for the web. For photography, it’s a superb trade-off of image quality for image size. On a typical webpage, when displaying a photograph, it’ doesn’t get much better. Things start to derail when Facebook gets a hold of it, and recompresses it to save space on their server.
I won’t go into the differences between a JPEG and PNG image – there is plenty to read with a simple google search. Just know, if you’re sharing on facebook, make your share images PNG files.
PNG files are lossless, meaning there is really no compression algorithm in place. The result is a crisp, clean image, with no artifacts, ghosting, etc, whether its a photographic image, vector art, or a combination, it looks pretty damn good. That being said, PNG is not a vector format. It’s a raster format with lossless compression. Don’t expect to get the same results from a PNG that you would an EPS file.
The Proof
So long story short, here’s the proof. I’ve taken a single high-resolution stock photo, and saved it as the Open Graph image for a page. I saved it twice. Once as a JPEG at maximum quality and once as a PNG. Both files were 1200×630 – the minimum that facebook recommends and shared them as a page test to see what would happen, and here’s the results:
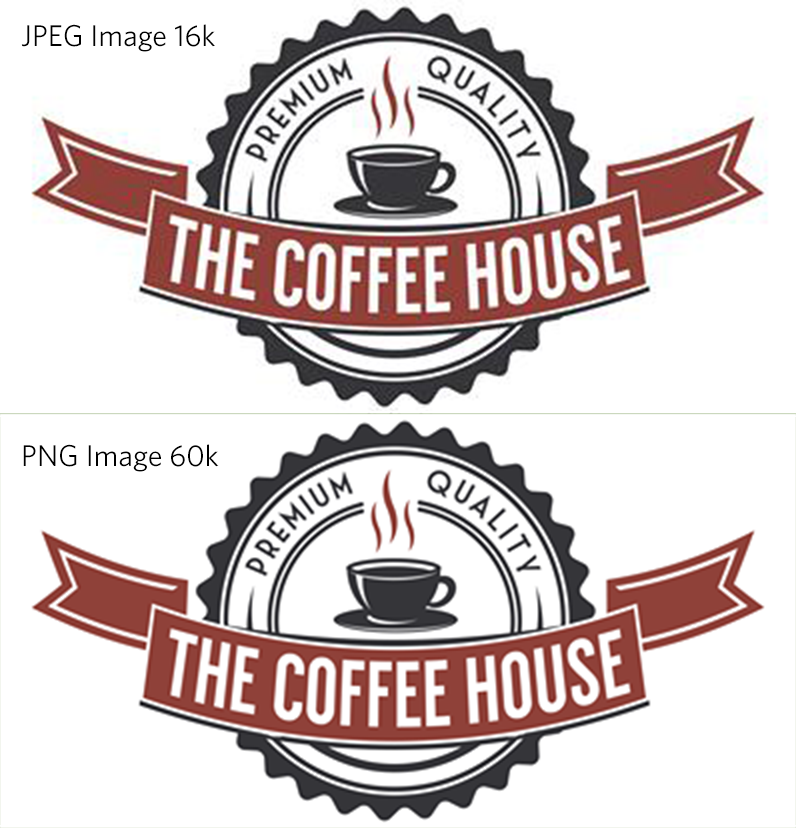
In this example, I’ve copied the result of what facebook did to the same image, uploaded in both JPEG and PNG format and blew it up double the size. You can plainly see the areas where JPEG artifacts have come into play.
The original JPEG image was 232k, the facebook result was 16k, a difference of about 93%
The original PNG image was 133k, the facebook result was 60k, a difference of only about 54%
So for the exact same image, which is reduced to 398×207, the JPEG image loses almost twice as much of it’s data as a PNG image.
(Click on the image below to get the full effect)
The Facebook Linter
The tool for checking how your shares show up on facebook is lovingly known as the linter (I have no idea where that name came from) or more professionally as the URL Debugger. This is a great way to check how your pages willl share before you actually share them, and alert you to problems.
Whenever you have added your OpenGraph tags, and you’re ready to share a page on facebook, use this tool to give you warnings or information about how it’s going to look when you finally pull the trigger.
